
Subscriptions Service
All users must be registered and logged in to CLASS to access the subscriptions service. To register, go to the home page and click the "register" link and create a CLASS Account. You will receive a CLASS username in your email as part of the account creation process.
Access the Subscription Service
Navigate to the home page and login with your CLASS account. Within the blue navigation menu, click the “Subscriptions” link, as shown in Figure 1 below.
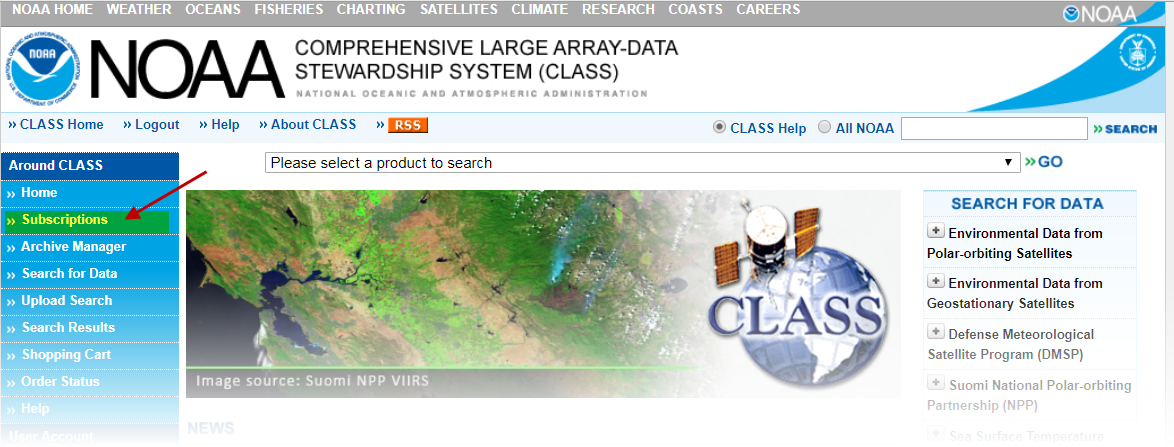
Figure 1. CLASS Home Page
Figure 2 shows the initial Subscriptions Service Web Page, titled Subscriptions.
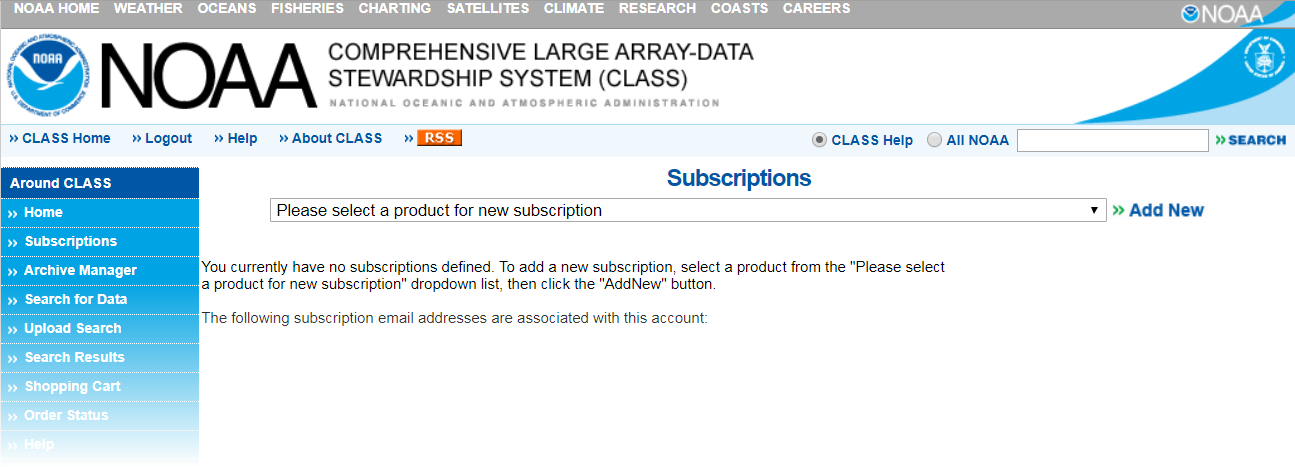
Figure 2. Subscriptions
Create a New Subscription
To create a new subscription, select your applicable Data Family Product within the product list dropdown (Figure 3), then click "Add New". In this example, the user wants to create a new subscription for the "JPSS Advanced Technology Microwave Sounder Data (ATMS_SDR). The Subscription Search Criteria page will be displayed (Figure 4).
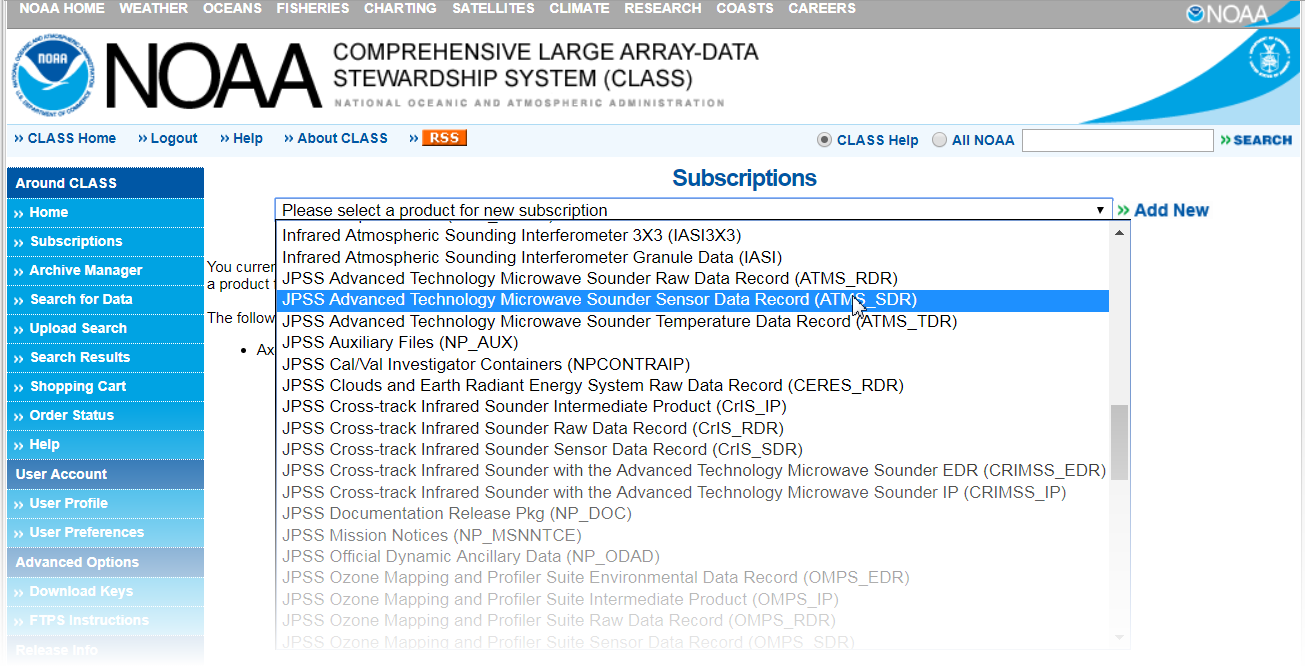
Figure 3. Dataset Selection
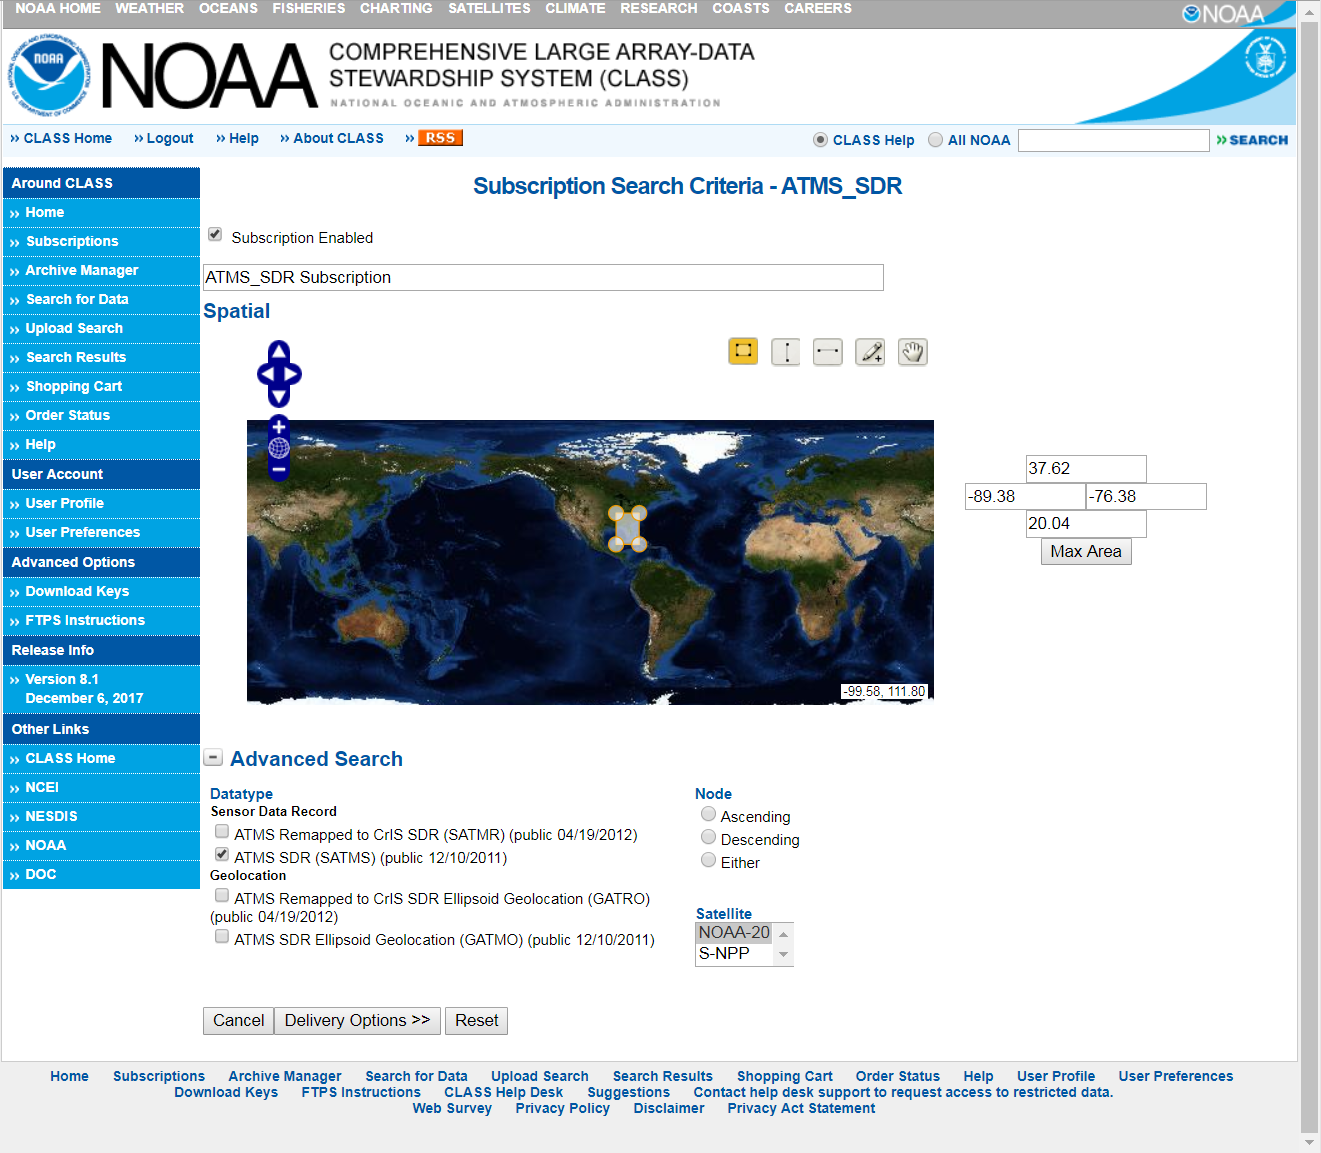
Figure 4. Subscription Search Criteria
On the Subscription Search Criteria Page, type in a name for the subscription and select the Advanced Search options that you wish to be delivered with this subscription. Then, click the "Delivery Options" button at the bottom of the screen to jump to the Subscription Services Delivery/Extraction Options Page (Figure 5).
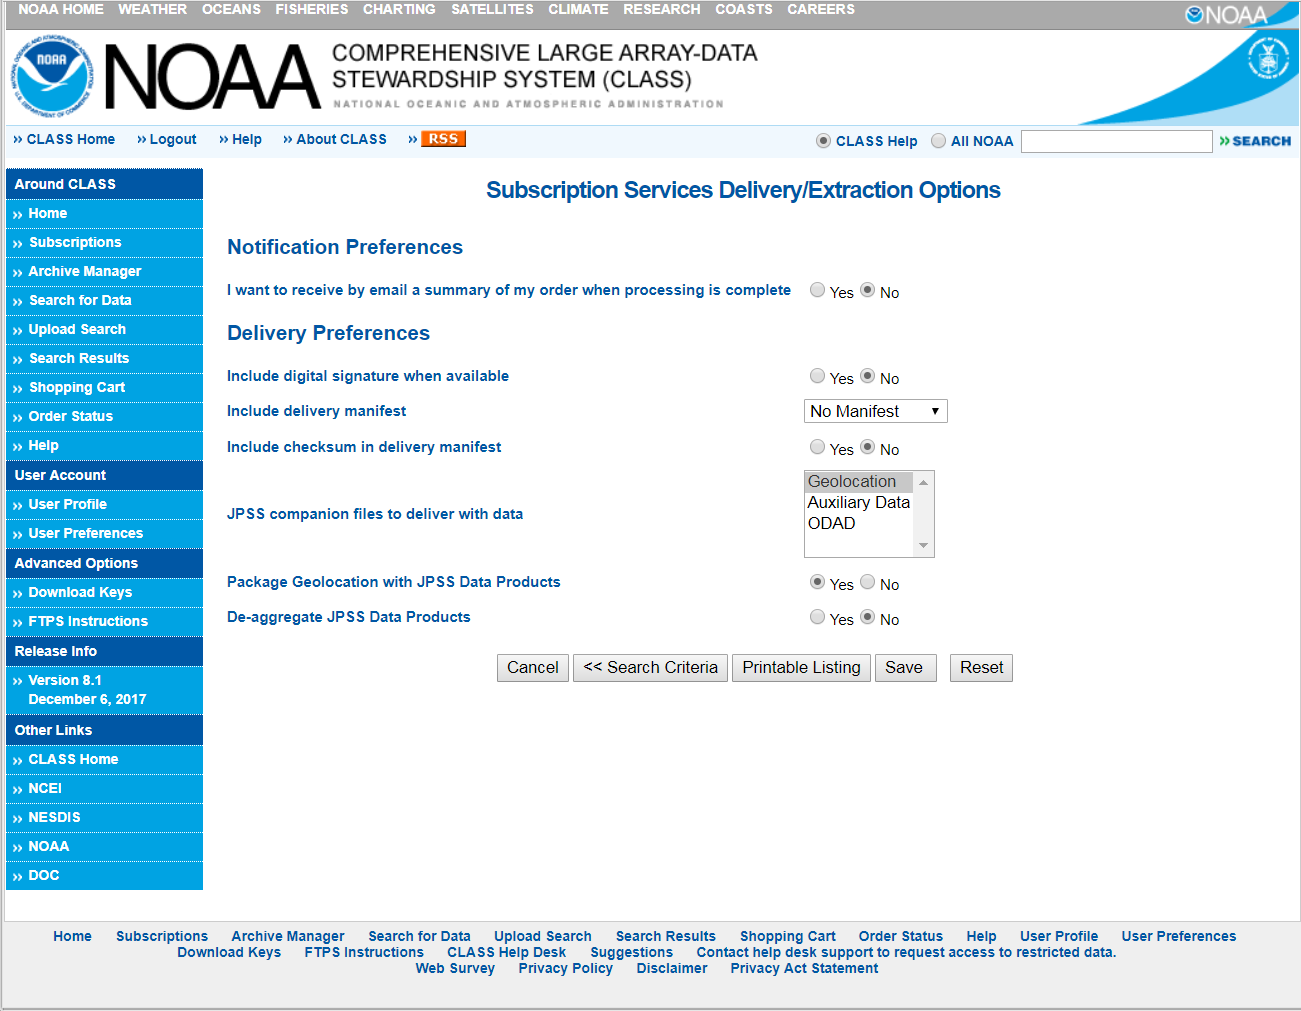
Figure 5. Delivery Options
Select your delivery options, then click the "Save" button to save your subscription. You will then return to the Subscriptions Page and your new subscription will be listed (Figure 6).
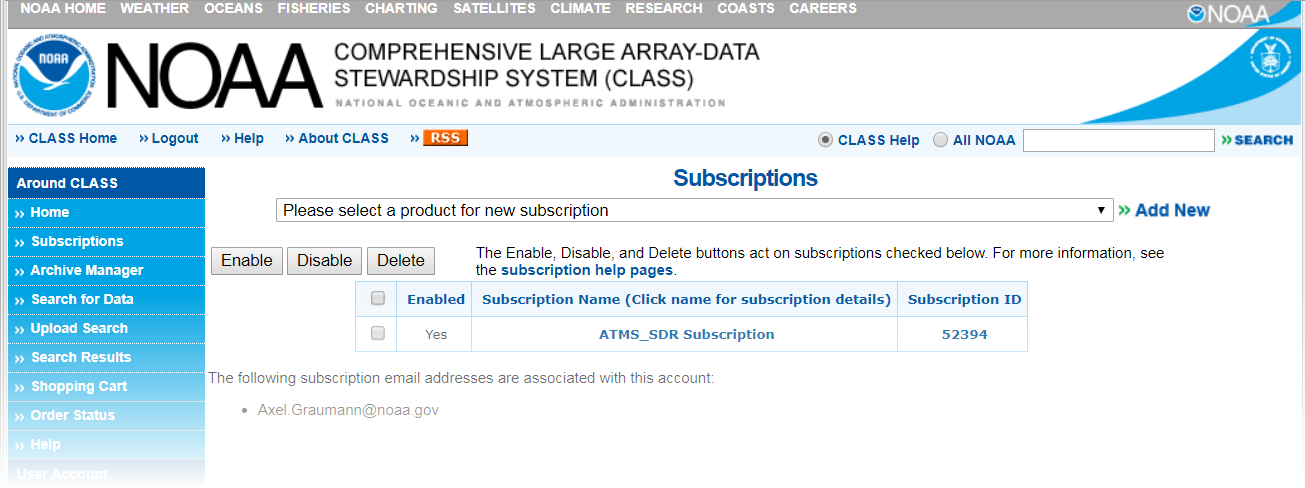
Figure 6. Subscription Summary Page with New Subscription
Modify Subscriptions
To change a subscription, click the subscription name on the Subscriptions page. Figure 7 shows the Subscriptions Page with three enabled subscriptions. The mouse pointer is highlighting the GOES-R ABI product subscription. Clicking the subscription name opens the search criteria for the subscription. From there, click the "Delivery Options" button to view and/or change those settings. Click the "Save" button to save all subscription changes.
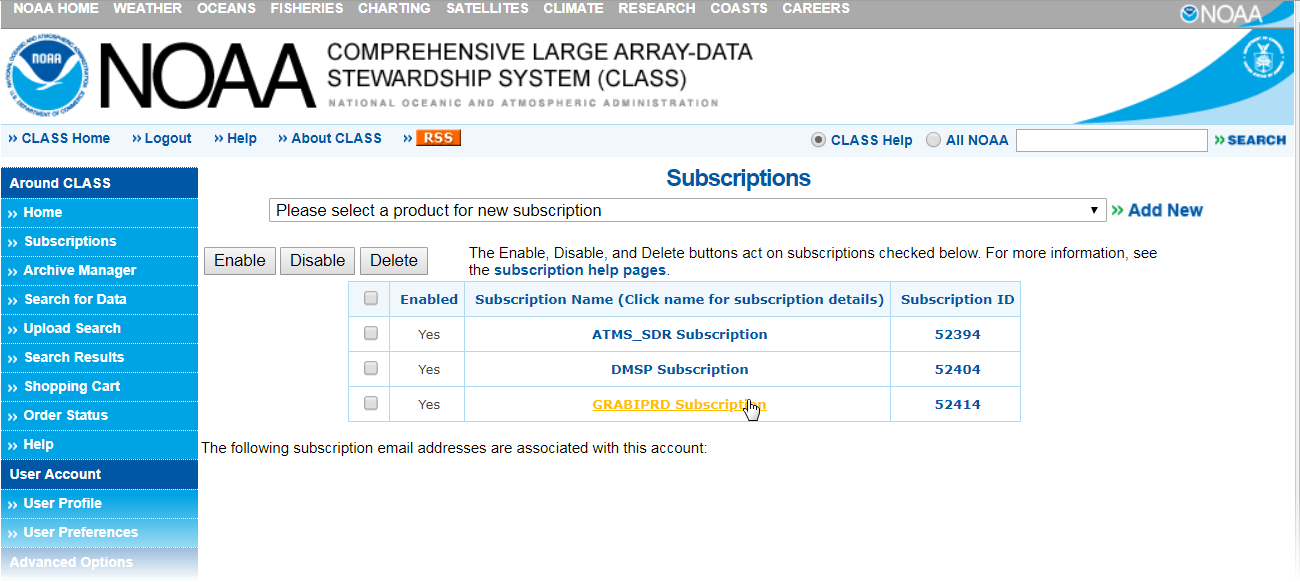
Figure 7. Subscriptions Page with Three Subscriptions.
Delete Subscriptions
To delete a subscription, check the checkbox in the row of the subscription(s) you wish to delete, then click the "Delete" button (Figure 8). You will then be asked to verify that you want to delete all checked subscriptions.
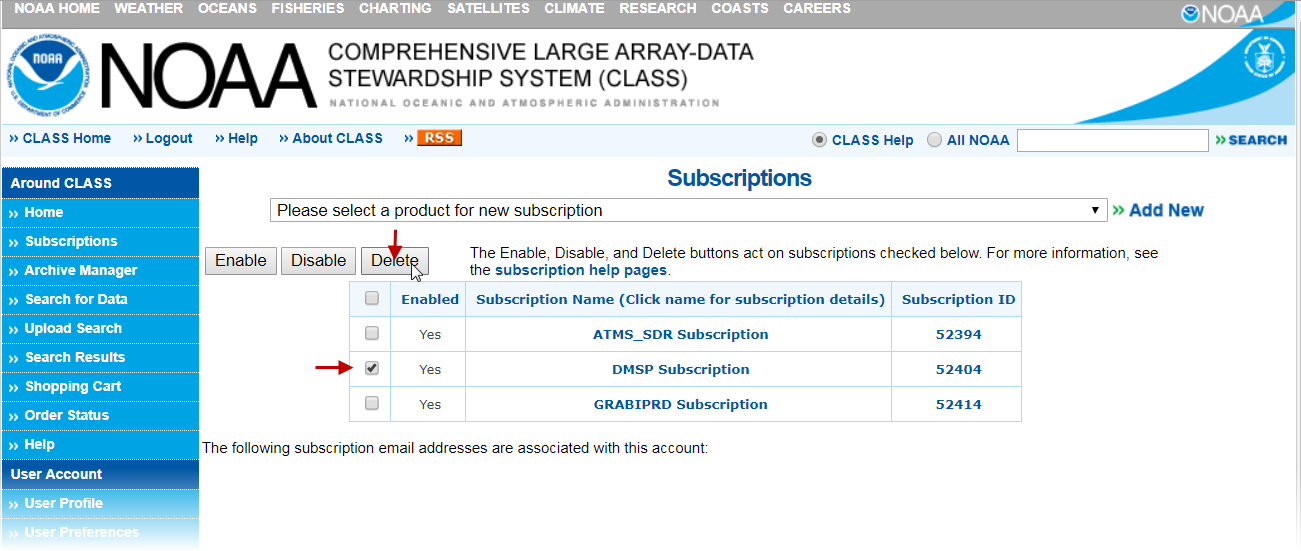
Figure 8. Subscription Deletion
Note that checking the checkbox on the title row (the top checkbox) will check all the check boxes. Unchecking this checkbox will uncheck all the checkboxes.
Disable/Enable Subscriptions
Subscriptions are enabled by default. To disable a subscription, check the checkbox in the row for the subscription(s) you wish to disable, then click the "Disable" button. All enabled subscriptions show "Yes" in the "Enabled" column. All disabled subscriptions show "No" in the "Enabled" Column (Figure 9).

Figure 9. Disable and Enable Subscriptions.
Email Notification
You can enter additional email addresses to receive subscription notification. To manage your subscription email addresses, click the "User Profile" link. Initially, you should see one email address listed (Fig 10). To add another email address, type in the new address in the text box labeled "New Subscription Email" and click the "Update" button. You should then see the new email address listed (Fig 11). By default, e-mail notifications are set to “No” in your User Preferences since you could potentially receive hundreds of e-mails daily for one product.
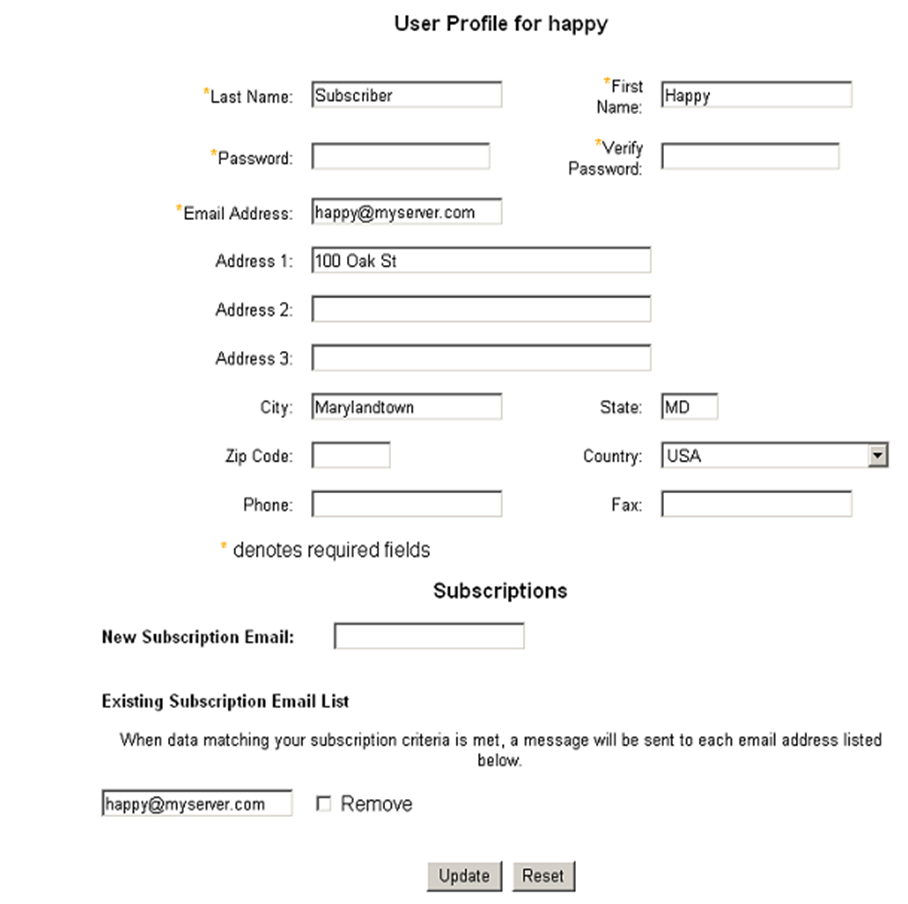
Figure 10. User Profile
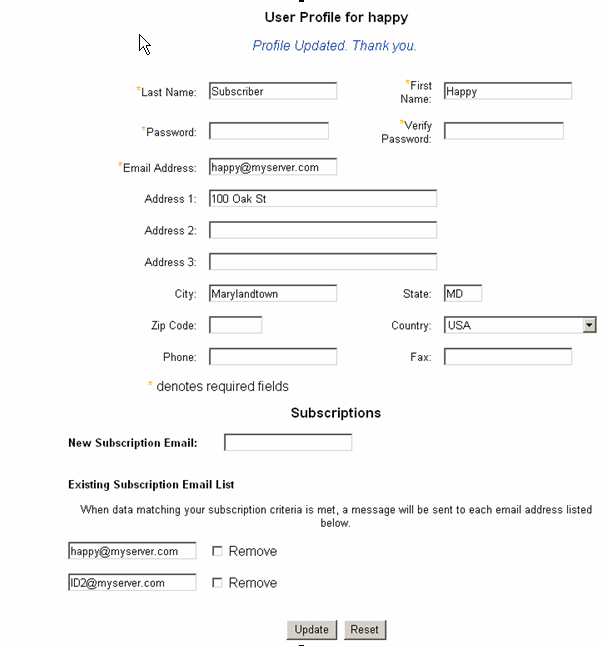
Figure 11. Additional Email for Subscription Notification.